Viewing the Self Check Diagnostic List
1. TV must be in standby mode. (Power off).
2. Press the following buttons on the Remote Commander within a second of each other:DISPLAY > Channel 5 > Volume - > TV POWER .
Results for all of the following diagnostic items are displayed on screen. No error has occurred if the screen displays a "0".
NOTE: If the Service Menu display text is not completely visible, press the Menu HOME button on the Remote Commander to refresh the display.
3. To exit Self Check display, turn the power off. Press [Menu] Exit.
Clearing the Self Check Diagnostic List
1. In Service Mode, press the Channel 8 Channel 0 .
RESETTING TO FACTORY DEFAULTSUse the following instructions to restore the User Controls and
Channel Memory settings to the preset factory conditions.1. While holding down the UP ARROW on the Remote Commander, press the POWER button on the right side of the set.The set restarts and displays the initial setup screen. This may take several minutes.
White Balance adjustment
1. Allow approximately 30 minutes for the set to warm up before proceeding with the white balance adjustment.
2. Connect the signal source to the 3 terminals of the Component In input (Y/Pb/Pr).
3. Set the Picture Mode to "VIVID" in the user menu.
4. Select the Component In input.
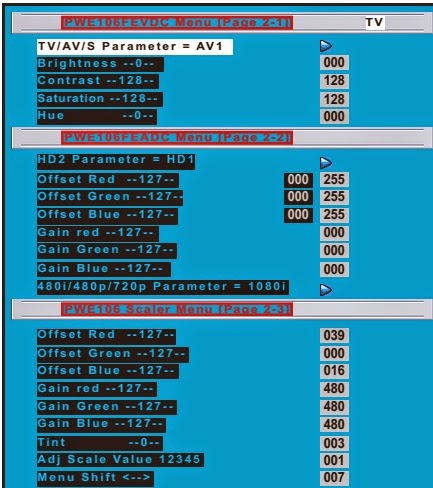
5. Open the Factory Service Menu (see section 3-1.) and select "Service Alignments Menu".
6. Set "White Point Red", "White Point Green", "White Point Blue" and "Black Level Offset Red", "Black Level Offset
Green", "Black Level Offset Blue" to average values .
"Cool " White Balance Adjustment
1. Select "COOL" from Color Tone in Service Alignments Menu.
2. Input 70IRE full white pattern signal into Component In.
3. Adjust "White Point Red", "White Point Green", "White Point Blue" in Service Alignments Menu if needed.
4. Input 25IRE full white pattern signal into Component In.
5. Adjust "Black Level Offset Red", "Black Level Offset Green", "Black Level Offset Blue" in Service Alignments Menu if needed.
6. Repeat steps 2 to 5 to achieve desired White Balance.
FOR MORE DETAILS CHECK THE FOLLOWING LINK
www.electro-medical.blogspot.com
google.com/+AjinGopakumar
USE SEARCH TAB TO FIND MODELS OR USE THE DROP DOWN MENU


×