2000 Harley Davidson FLHTCUI Electra Glide Ultra Classic Logo
Posted on Apr 13, 2011

Wiring diagram of ignition module plug and witch wires should power up with the key on

  • Marvin
    Marvin Apr 13, 2011

    We have no factory repair manuals

×

5 Related Answers

Robert Sawart

  • 65 Answers
  • Posted on Aug 17, 2009

SOURCE: Where can I find a wiring diagram (online) for a HD Dyna Ignition

Need more info but try this:http://www.dynaonline.com/skins/downloads/instruct/DP4000-HD2.pdf

Ad

Anonymous

  • 6966 Answers
  • Posted on Dec 07, 2009

SOURCE: wiring diagrams for a ignition module on a yamaha

Hi and welcome to FixYa,

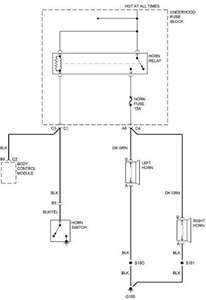
The post is under an 81 Yamaha XJ650 and the need is for the wiring diagram (of the ignition module). Should you be interested, here is the wiring diagram of the entire bike.

Good luck and thank you for asking FixYa.

Anonymous

  • 4565 Answers
  • Posted on Jul 04, 2010

SOURCE: I need a wiring diagram for a electronic ignition module.

If I understand correctly, Your bike has points in it now and you want to go to electronic ignition. If that's what you want to do, I would suggest that you go with one of the aftermarket ignition units. They're more versatile, costs less, and easier to install.

There are two types available. Your bike has a mechanical timing advance unit behind the points breaker plate. One type of electronic unit eliminates this mechanical part and makes the system truly maintenance free while the other type retains the mechanical advance unit and cost less. A prime example is Crane Cam's HI-1 unit that retains the mechanical advance and their HI-4 unit that eliminates it. Most bikes made after 1984 do not have the mechanical advance units. Since your bike does not have any of the original components left on it, I would suggest that you get one of the units that goes in the "nose cone" of the engine. It simply replaces the everything in there if you get the unit that does not use the mechanical advance. The Mechanical advance units are prone to wear and since no one ever services them, I'd suggest getting rid of it. You'll have to purchase a "timing cup" from Harley, costs about $20, a lot less than $100 bucks for needle bearing mechanical advance unit. Get the shorter screw that goes with it as well.

All you have to have with either unit is a "hot" wire going to the coil. The coil must have a primary resistance of somewhere around 3-4 ohms where a points type coil has a primary resistance of 4-6 ohms. To determine the resistance of your coil use a Digital Volt Ohm Meter and measure the resistance between the two small terminals on the coil. To wire the ignition units is usually just a two or three wire hookup that is very simple. They all come with wiring instructions.

Now, the next thing is whether you wish to stick with "dual fire" ignition or go to "single fire" ignition. Dual fire is the system that almost all Harley's come equipped with from the factory. In this type of system, both spark plugs fire when the pistons are top dead center. Since one piston is on the exhaust stroke, that spark is of no consequence and therefore is considered a 'wasted spark". In a "single fire" system, the spark plugs fire independently when each piston comes to TDC on the compression stroke. It requires either two coils or a "two in one" type coil. This added coil increases the cost of the system and to be honest with you, I cannot tell a difference between the two systems. With that in mind, I opt to go with the less expensive and simplier "dual fire" system.

http://www.cranecams.com/?show=browseParts&lvl=2&prt=4
http://www.compufire.com/harley-main.html
http://www.dynaonline.com/skins/harley_davidson_category.aspx

Custom Chrome online catalog. http://www.customchrome.net//icatalog/full.aspx?Page=571

Ok, this will get you started. Installing an electronic ignition system in an older Harley is easy to do. The difficult part is deciding which one to go with. Once you do that, no problem. If you have anymore questions, drop me a line at [email protected] .

To see how to hook up one of the units, go to their website and look for a "Technical" page. Go to that page and look for "installation Instructions". Print them out and it'll tell you everything you need to know. If not, I've got some different types of systems installation instructions that I can scan and send to you.

Good Luck
Steve

Anonymous

  • 4565 Answers
  • Posted on Nov 16, 2010

SOURCE: I have a 1979 harley

The original wires, one blue and one white, were with the points ignition. The white wire should be the "Hot" wire. Now, look at your wiring diagram. The two white wires should go together to one side of the coil and the blue to the other. There is no positive or negative side of the coil, just two small primary winding terminals. Make sure the white wire from the ignition system is the "hot" or power wire for 12 volts. If you connect the ignition unit up backwards, it will damage it. To make sure the white wire on the bike is the hot wire, simply turn the ignition switch on and check this wire with a test light or volt meter. It should show battery voltage on it. That should be your setup, two white wires on one end of the coil and a blue wire on the other.

Good Luck
Steve

Anonymous

  • 4565 Answers
  • Posted on Jun 05, 2011

SOURCE: I need a Wiring diagram

Have you tried going to the manufacturer's website. Most of them have a website that has a "technical help" section and they offer free downloads of the installation instructions. In these installation instructions is a wiring diagram.

Good Luck
Steve

Ad

Add Your Answer

×

Uploading: 0%

my-video-file.mp4

Complete. Click "Add" to insert your video. Add

×

Loading...
Loading...

Related Questions:

0helpful
1answer

John Deere 275, I keep losing spark. Any ideas?

I think it's a magneto ignition which means it should spark unless the (white ?) wire between the coil and the ignition module is earthed. To stop the motor this wire is connected to earth by either the key switch (turning key to "Off") or the ignition relay drops out (can happen if the seat switch is not switched on). Probably worth checking the seat switch is working reliably early on.
Simplest way to check is to find the stop wire and disconnect it (leaving the coil connected to the ignition module). You'll have to re-connect to stop the motor, or short the coil - ignition module wire to earth.
See bottom circuit diagram.
Good luck.

9ka
0helpful
1answer

I need the wiring diagram for the 2006 chevy avalanche ignition

http://www.bbbind.com/free_tsb.html free wiring diagrams . Ignition switch or ignition system - coils , plugs , wires etc... .
Everything on your vehicle is electronically controlled by the BCM - body control module .
On vehicles that have several control modules connected by serial data circuits, one module is the power mode master (PMM). On this vehicle the PMM is the body control module (BCM). The BCM uses 3 signals from the ignition switch. These are the Ignition 0, Ignition 1, and Accessory.
Discrete Ignition Signals
Those modules that have discrete ignition signal inputs also remain in the state dictated by the last valid BCM message received on the serial data circuits. They then check the state of their discrete ignition input to determine the current valid state. If the discrete ignition input is active, B+, the modules will fail-safe to the RUN power mode. If the discrete ignition input is not active, open or 0 voltage, the modules will fail-safe to OFF-AWAKE. In this state the modules are constantly checking for a change status message on the serial data circuits and can respond to both local inputs and serial data inputs from other modules on the vehicle.
Your best bet , take it to a qualified repair shop !
0helpful
1answer

I need a wiring or instalation diagram for 03 silverado

Download manual from the attached link: https://www.gmupfitter.com/publicat/2004_BB/2003_Beyond_LD_Electric_CK.pdf
http://alarmsellout.com/support/diagrams/vehicle/CHEVROLET%20SILVERADO%201988-2005.pdf

This may help:
http://www.automotivetroubleshootingsecrets.com/2003_Chevrolet_Silverado_1500_4.8L_No_Start_Stall.html

This may help:
2003-2006 Chevrolet Silverado Wiring Diagram:
Listed below is the vehicle specific wiring diagram for your car alarm, remote starter or keyless entry installation into your 2003-2006 Chevrolet Silverado . This information outlines the wires location, color and polarity to help you identify the proper connection spots in the vehicle. Please be sure to test all of your wires with a digital multimeter before making any connections.

PART COLOR LOCATION 12 VOLT CONSTANT RED (+) @ IGNITION SWITCH HARNESS STARTER YELLOW (+) @ IGNITION SWITCH HARNESS STARTER 2 N/A IGNITION 1 PINK (+) @ IGNITION SWITCH HARNESS IGNITION 2 WHITE (+), SEE NOTE #2 @ IGNITION SWITCH HARNESS IGNITION 3 N/A ACCESSORY/HEATER BLOWER 1 ORANGE (+) @ IGNITION SWITCH HARNESS ACCESSORY/HEATER BLOWER 2 BROWN (+) @ IGNITION SWITCH HARNESS KEYSENSE N/A PARKING LIGHTS ( - ) GRAY/BLACK (-) @ BCM, BROWN PLUG, PIN B2, SEE NOTE #3 PARKING LIGHTS ( + ) BROWN (+) IN DRIVERS KICK PANEL POWER LOCK SEE NOTE #1, (for BASE MODEL TRUCKS, SEE NOTE #4) POWER UNLOCK SEE NOTE #1, (for BASE MODEL TRUCKS SEE NOTE #4) DOOR TRIGGER GRAY/BLACK (-)(DRIVERS) and BLACK/WHITE (-)(PASSENGER), SEE NOTE #5 @ EACH DOOR MODULE, IN EACH DOOR DOMELIGHT SUPERVISION GRAY/BLACK (-) @ BCM, BLACK PLUG, PIN E, SEE NOTE #3 TRUNK RELEASE N/A SLIDING POWER DOOR N/A HORN BLACK/YELLOW to BLACK (-) @ STEERING COLUMN HARNESS TACH Any wire NOT, PINK, BLACK or BROWN (AC) @ IGNITION COILS or FUEL-INJECTORS WAIT TO START LIGHT DK. BLUE (-) @ INSTRUMENT CLUSTER, PIN A2 BRAKE WHITE (+) @ BRAKE PEDAL SWITCH FACTORY ALARM DISARM LT. GREEN (-) @ DRIVERS DOOR MODULE, IN DOOR, BLACK 26-PIN PLUG PIN 15 ANTI-THEFT GM'S PASSLOCK 2 ANTI-THEFT SYSTEM, SEE NOTE #1 @ IGNITION SWITCH EXTRA INFORMATION NOTE #1: This vehicle uses GM'S PASSLOCK 2 ANTI-THEFT SYSTEM that requires a 791 Bypass Module to Remote Start, if you are using a REMOTE STARTER ONLY, use the 791. IF you are installing a REMOTE STARTER with KEYLESS ENTRY you MUST USE the INTERFACE BYPASS MODULE, Part # DB-ALL or XK09, EITHER Bypass will do the Anti-theft and Keyless entry. If connecting a keyless entry only you can use the GMDL-BP. NOTE #2: The IGNITION #2 wire WHITE must be connected to prevent a CHECK ENGINE LIGHT from turning on and to prevent DAMAGE to the TRANSMISSION on this Vehicle. NOTE #3; The BCM is located under the Drivers Side of the dash, the BCM has 6 plugs on it, with the PURPLE plug on the back. NOTE #4: On BASE model truck the DOOR LOCK INTERFACE MODULE is not necessary, the LOCK wire is a LT BLUE (TYPE B) @ the BCM, LT BLUE PLUG, PIN B5, and the UNLOCK wire is a WHITE (TYPE B) @ the BCM, LT BLUE PLUG, PIN B10. NOTE #5: On BASE Model trucks, the Door Trigger wires are @ the BCM, LT BLUE PLUG, PINS B4 and A5. On 4-Door Trucks the LEFT REAR Door is a LT BLUE/BLACK (-) PIN A3 and the RIGHT REAR Door is a LT GREEN/BLACK (-) PIN A2, located in a PURPLE PLUG at the BCM, use all 4 wires and diode isolate when installing an alarm system.
03 silverado wiring diagram-dfydxumns33ohqc3bsmt22yf-2-1.jpg

2011-03-23_212446_1-dfydxumns33ohqc3bsmt22yf-2-4.gif

2011-03-28_044351_brakes_lamps_circuit_2003_2500_siverado-dfydxumns33ohqc3bsmt22yf-2-8.gif

2012-06-07_153513_starter1-dfydxumns33ohqc3bsmt22yf-2-13.gif

chevroletsilveradohorncircuit_thumb-dfydxumns33ohqc3bsmt22yf-2-19.jpg

chevrolet-silverado-wiring-diagram-wire-diagram-dfydxumns33ohqc3bsmt22yf-2-26.png

collection-fuel-2003-chevy-silverado-wiring-diagram-estimation-information-standard-work-therefore-straight-swapped-dfydxumns33ohqc3bsmt22yf-2-34.jpg

drivers2-dfydxumns33ohqc3bsmt22yf-2-43.jpg

igniton-black-2003-chevy-silverado-wiring-diagram-neutral-before-position-begin-switch-know-scheme-unsure-pairs-dfydxumns33ohqc3bsmt22yf-2-53.png

passen2-dfydxumns33ohqc3bsmt22yf-2-64.jpg

sensor-primary-2003-chevy-silverado-wiring-diagram-fuel-pump-plugs-solid-conductors-important-looking-more-channels-dfydxumns33ohqc3bsmt22yf-2-76.png

2011-03-07_083537_3-7-2011_12-28-24_am-dfydxumns33ohqc3bsmt22yf-2-89.png

2011-03-23_212446_1-dfydxumns33ohqc3bsmt22yf-2-103.gif

2011-05-14_175028_2003_stop_lamps-dfydxumns33ohqc3bsmt22yf-2-118.gif

2012-06-07_153513_starter1-dfydxumns33ohqc3bsmt22yf-2-134.gif

igniton-black-2003-chevy-silverado-wiring-diagram-neutral-before-position-begin-switch-know-scheme-unsure-pairs-dfydxumns33ohqc3bsmt22yf-2-151.png
0helpful
1answer

I have an L100 series John Deere tractor mower. Pretty sure the Magneto is not sparking. Need the diagram.q

A quick test is to unplug the small wire plugged onto the ignition module if it starts then it is good , you will need to plug it back in to shut it off when the key is in the off position.You will find the ignition module under the flywheel shroud, it has the spark plug wire on it. The wire runs through some safety switches on its way to the key and those switches are most likely the problem.
l100-series-john-deere-tractor-mower-m2mizp43bkmzw3fx5kho4lpr-4-0.jpg
0helpful
2answers

Lost power to Headlights, Turn signals, AC Fan and Wipers all at the same time!

What make vehicle ,model an year ? Most newer vehicles the ignition switch is an input to a module an the module BCM -body control module energizes relays that power up the vehicle systems . .You can go to www.bbbind.com for free wiring diagrams an power distribution diagrams an see what these systems have in common , it could also be a ground side problem . On the home page at bbbind click on technical information , five box will pop up . click on tsb's an free wiring diagrams. Next page go to the bottom an click I agree . On the next page click wiring diagrams an then enter your vehicle info. Under system click on electric distribution ,subsystem click power distribution first ,then go back an check ground distribution
0helpful
1answer

Wires are broke loose from the key switch on my 250 suzuki four wheeler witch wire sends fire to the plug

the key when on sends power to the ecm electrical control module this in turn sends it to the coils and then to the spark plugs get a wiring schematic for your quad and rehook them up to the key
0helpful
1answer

ON A PIONEER CAR UNIT MODEL AVHP49000DVD , I BOUGHT IT USED , THEN HAD TO BUY A POWER PLUG FROM PIONEER WITH A WIRING DIAGRAM , PUT IT IN MY 2006 GMC TRUCK WITH A FACTORY WIRING ADAPTER IT WILL NOT COME...

You will need to connect the pioneer unit to a switched ignition wire from the ignition switch. The 2006 GM factory radio only has a constant B+ (orange wire) and ground (black wire). The factory radio turns on when the Body Control Module (BCM) sends the radio a turn-on signal (on a data communication line) when the key is turned on. Your pioneer unit won't talk to the truck's BCM, and will need you to wire a switched B+ feed to it that turns on in the ignition accessory and run positions.
9helpful
3answers

I need to disable my alarm on a 1997 bmw 528i.

Now im not sure since the manual says your model has the same alarm system as the 328i and on the 328i you can remove the module to disable by doing the following. you can unplug the control module. It is located under the glove box. Climb under the dash on the passenger side and remove a few screws on the trim panel under the glove box. Theres a black control module with a green connector. There should be a lock tab on the connector. press the lock tab and pull out the connector. The alarm should now be disabled. But if it has the special transponder key this may not work.
But if the only reason you want to disable it is because of the motion sensor setting of the alarm for no reason there is a solution for this. To disable the motion sensor, hit the lock button to arm, then hit lock button again within four seconds to disable motion sensor. Red light on rearview mirror should flash four times, then pause, then start flashing on regular intervals. this is most likely the reason if your having the issue where the alarm goes off every 20 minutes.
If you want to completely remove it below is a wiring diagram taken from the manual for you alarm system.
this is from the manual its the alarm wiring diagram.
Battery Constant 12v Positive Wire ( ): Red/White or RedBattery Constant 12v Positive Wire Location: Ignition Switch Harness
Starter Positive Wire ( ): Black/Yellow or Black
Starter Positive Wire Location: Ignition Switch Harness
Ignition Positive Wire ( ): Green
Ignition Positive Wire Location: Ignition Switch Harness
Second Ignition Positive Wire ( ): Purple/White or Purple
Second Ignition Positive Wire Location: Ignition Switch Harness
Parking Light Positive Wire ( ): Gray/Purple and Gray/Yellow. Use Both Wires. This vehicle has a dual parking light system that will require 2 extra relays.
Parking Light Positive Wire Location: At Headlight Switch
Power Door Lock Positive Wire ( ): White/Red
Power Door Lock Positive Wire Location: At Factory Alarm Plug. The alarm plug is a black 12 pin plug located just behind the glove box.
Power Door Unlock Positive Wire ( ): Blue/Red
Power Door Unlock Positive Wire Location: At Factory Alarm Plug. The alarm plug is a black 12 pin plug located just behind the glove box.
Door Trigger Negative Wire (-): Brown/Gray
Door Trigger Negative Wire Location: At Factory Alarm Plug. The alarm plug is a black 12 pin plug located just behind the glove box.
Domelight Supervision Wire: Turns On With Unlock
Domelight Supervision Wire Location: N/A
Horn Negative Wire (-): Brown/Red or Brown/Yellow
Horn Negative Wire Location: At Steering Column Harness
Tachometer Wire Negative Wire (-): Black
Tachometer Wire Negative Wire Location: At Instrument Cluster
Brake Light Positive Wire ( ): Blue/Red or Green/Red
Brake Light Positive Wire Location: At Switch Above Brake Pedal
Factory Alarm Disarm Wire (-): Disarms With Factory Remote Only. Factory Alarm Disarm Wire Location: N/A
Factory Anti-Theft System: Transponder Anti-Theft System, Requires Bypass And Extra Ignition Key. The 1997 model year vehicle may require a bypass module and an extra ignition key, if vehicle is equipped with a special key from BMW.
Factory Anti-Theft System Location: Transponder At Ignition Switch Tumbler
if you require further assistance please let me know and i will help assist you from there. Thanks, Midwest-Tek
6helpful
2answers

Were is the ignition module located at do you have a pic or diagram

Ignition control module is located under the ignition coil packs, follow the spark plug wire''s from engine to coil packs.
If you have a 3.1L engine, the module will have three connector, two one one end and one in the other end.
If you have a 3.8L engine, the module will have one wide connector on one end only.
To remove module, remove all three coil pack's, will have two small screw's to each one,disconnect elec. connector from module and unbolt module.
1helpful
3answers

Wiring diagram

Helpful Wiring Information when hard wiring your brake control:
Run two wires to the battery:
White - Ground
Black - Power
Blue - Run to Electric Brakes at the Rear Plug
Red - Run to cold side of brake switch off of the brake pedal (using a test light to find the cold side)
Note: Always wire the red wire to the heaviest gauge wire when testing cold side of brake switch.

You can view more info here. http://store.drawtite.com/brakecontrols.html
Not finding what you are looking for?

1,389 views

Ask a Question

Usually answered in minutes!

Top Harley Davidson Experts

Arnie Burke
Arnie Burke

Level 3 Expert

7339 Answers

Sean Wright
Sean Wright

Level 3 Expert

2045 Answers

ZJ Limited
ZJ Limited

Level 3 Expert

17989 Answers

Are you a Harley Davidson Expert? Answer questions, earn points and help others

Answer questions

Manuals & User Guides

Loading...