This tip talks about 3 ways to transfer photos from iPhone 6/5S/5C/5/4S to your Mac computer.
Solution 1. How to Transfer Photos from iPhone to Mac with iPhoto
This method is applied to transfer the camera roll photos from your iPhone to Mac.
Step 1. Connect your iPhone to Mac with USB cable, and launch iPhoto if it doesn't open automatically.
Step 2. Select the photos you want to transfer > Click Import (if you choose all the photos) or Import Selected (if you just choose some of them).
Solution 2. How to Transfer Photos from iPhone to Mac with Preview
Step 1. Launch Preview. Connect your iPhone to Mac with USB cable.
Step 2. Click File at the upper left corner of your screen.
Step 3. Choose Import from your iPhone, choose the photos you want to transfer by clicking Import or Import All. Choose destination for your iPhone photos.
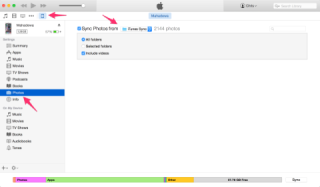
Solution 3. How to Transfer Photos from iPhone to Mac with PhotoTrans
1. Supports transferring photos from iPhone to Mac and vice verse easily.
2. Gives you the ability to add and delete photos, and even albums.
3. Transfers all the photos, including Camera Roll, Photo Stream, Photo Library and My Albums from your iPhone to Mac.
4. Super fast transfer speed allows you to transfer a large number of photos in minutes.
Step 1: Download PhotoTrans and install it on your Mac.
Step 2: Launch PhotoTrans and connect your iPhone to Mac via USB cable.
Step 3: On the PhotoTrans's homepage, click "Export" > Select Photo Source you want to transfer > Click "Browse" to choose destination for your output photos > Click "OK" to start.
Resource from:
http://www.imobie.com/support/how-to-transfer-photos-from-iphone-to-mac.htm


×