Many users have installed Windows 10/8/7 on a solid state drive (SSD) to get better read/write speed and boot speed. You may want to reset SSD to factory settings and start it over when your SSD is running slow or when you just want to dump it.
As you know, like USB flash drives, SSDs have a limited number of times that you can write data to. Therefore, you cannot reset SSD to factory default using the way of
wiping hard disk drives (HDDs). How can you remove all data without hurting the SSD? You can perform a SSD Secure Erase.
An SSD is most likely your boot drive, so here we will show you how to erase SSD without loading Windows 10/8/7. You need to prepare a writable USB flash drive or CD/DVD to create a bootable disk. 2GB of space is enough.
1.
Download and install AOMEI Partition Assistant. Connect a USB drive or CD to your computer.
2. In the main interface, click Make Bootable Media from the left panel and follow the wizard to
create a bootable media.
3. Reboot your computer. At startup, press a specific key (F2 or Delete) repeatedly to enter BIOS and then change first boot order to the bootable disk you just created.
4. Then it will load AOMEI Partition Assistant. Click SSD Secure Erase and click Next.
5. Select the SSD that you want to reset to factory settings and click Next.
6. Confirm the SSD identification information just in case of deleting the wrong SSD. Click Next to continue.
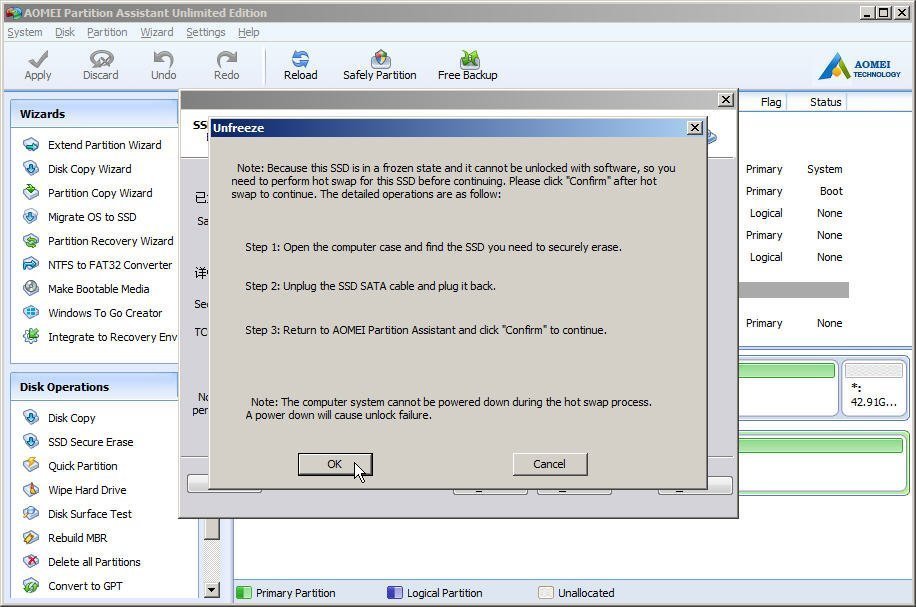
7. In the next window, you will probably see the SSD is in Frozen state and it cannot be unlocked. Then you should perform a hot swap for this SSD just as instructed.
8. After reconnecting the SSD, click OK to start the Secure Erase for your SSD.
n seconds or probably milliseconds, you will see the SSD is a block of unallocated space and then you have successfully reset SSD to factory settings. Before you install Windows, you can use this freeware to partition the SSD and
format SSD as you like.


×