Water leaks at the bottom
1. Find out where the leak is coming from. Does it leak constantly or during one part of the cycle?
A constant leak means the leak is in the valve where the hoses hook to the washer, the supply valves, or the lines to the washer from the water supply.
The other two options are when the washer is agitating or pumping the water out between cycles.
2. See if it leaks during both cycles and the test there would be to lift the lid just as it starts to drain and wait to see if the water stops leaking.
If it doesn't, then run the drain cycle to see if it gets worse or better.
Results may not be immediate as it would take a few minutes for whatever water there to finish dripping.
3. Wait until the water has been pumped out, lift the lid and check the drip again.
When the location of the leak has been determined, unless the washer has been frozen, most leaks can be fixed without parts and just using hand tools.
If you have an older, top load washer, the back or front will come off so you can observe where the leak is coming from.
WARNING. You are working with a moving, electrically hot machine that could flood.
You must take your time and not put your hand or hair in somewhere that can catch you.
You should not have to get into the upper control center, thus reducing the shock hazard.
4. Before turning the machine on, remove a cover. On some washers, there are two screws on the bottom L & R front corners that take the front panel loose.
Once the screws are removed, the front cover is hinged at the top and you simply pull the bottom away from the machine until it comes un-hooked, and set the cover aside.
There shouldn't be many exposed wires or ends, but a few. Don't touch the terminals or lay something metal in the machine that could fall on the terminals.
5. Take a flashlight, look for obvious leaks or better, water stains around nuts, hose clamps, etc.
Most likely you'll see some water residue here and there and that would be normal as a washer is wet. Look for puddles, long white streaks, calcium deposits.
Most likely, you won't find standing water, but some clues of where you should look when the machine is running.
Unless this leak is so obivous you can see what's wrong, you don't need to start it and you should repair the problem.
Once possible areas have been identified, you should start the machine as if you had a load in it and start to watch for the leak.
WARNING- Make sure you have no tools laying in the machine and you are out of the way. There are spinning parts and live wires once you turn the machine on.
Stay clear, and watch your hair and hands.
Once the machine is full and starts its cycle, look for leaks.
Let the machine do its cycle and as it goes into each part of the cycle, look for the leak.
Once you find a drip, stop the machine by lifting the lid or pulling out on the control knob, and now observe more closely.
Remember, water runs down; where it drips is not necessarily the place of origin.
6 Find the leak and make the needed adjustment (which will be all that is necessary most of the time).
If it is a part you need, get the make, model number and serial number of the washer and call an appliance parts dealer or repair service if you don't think you can repair the problem.
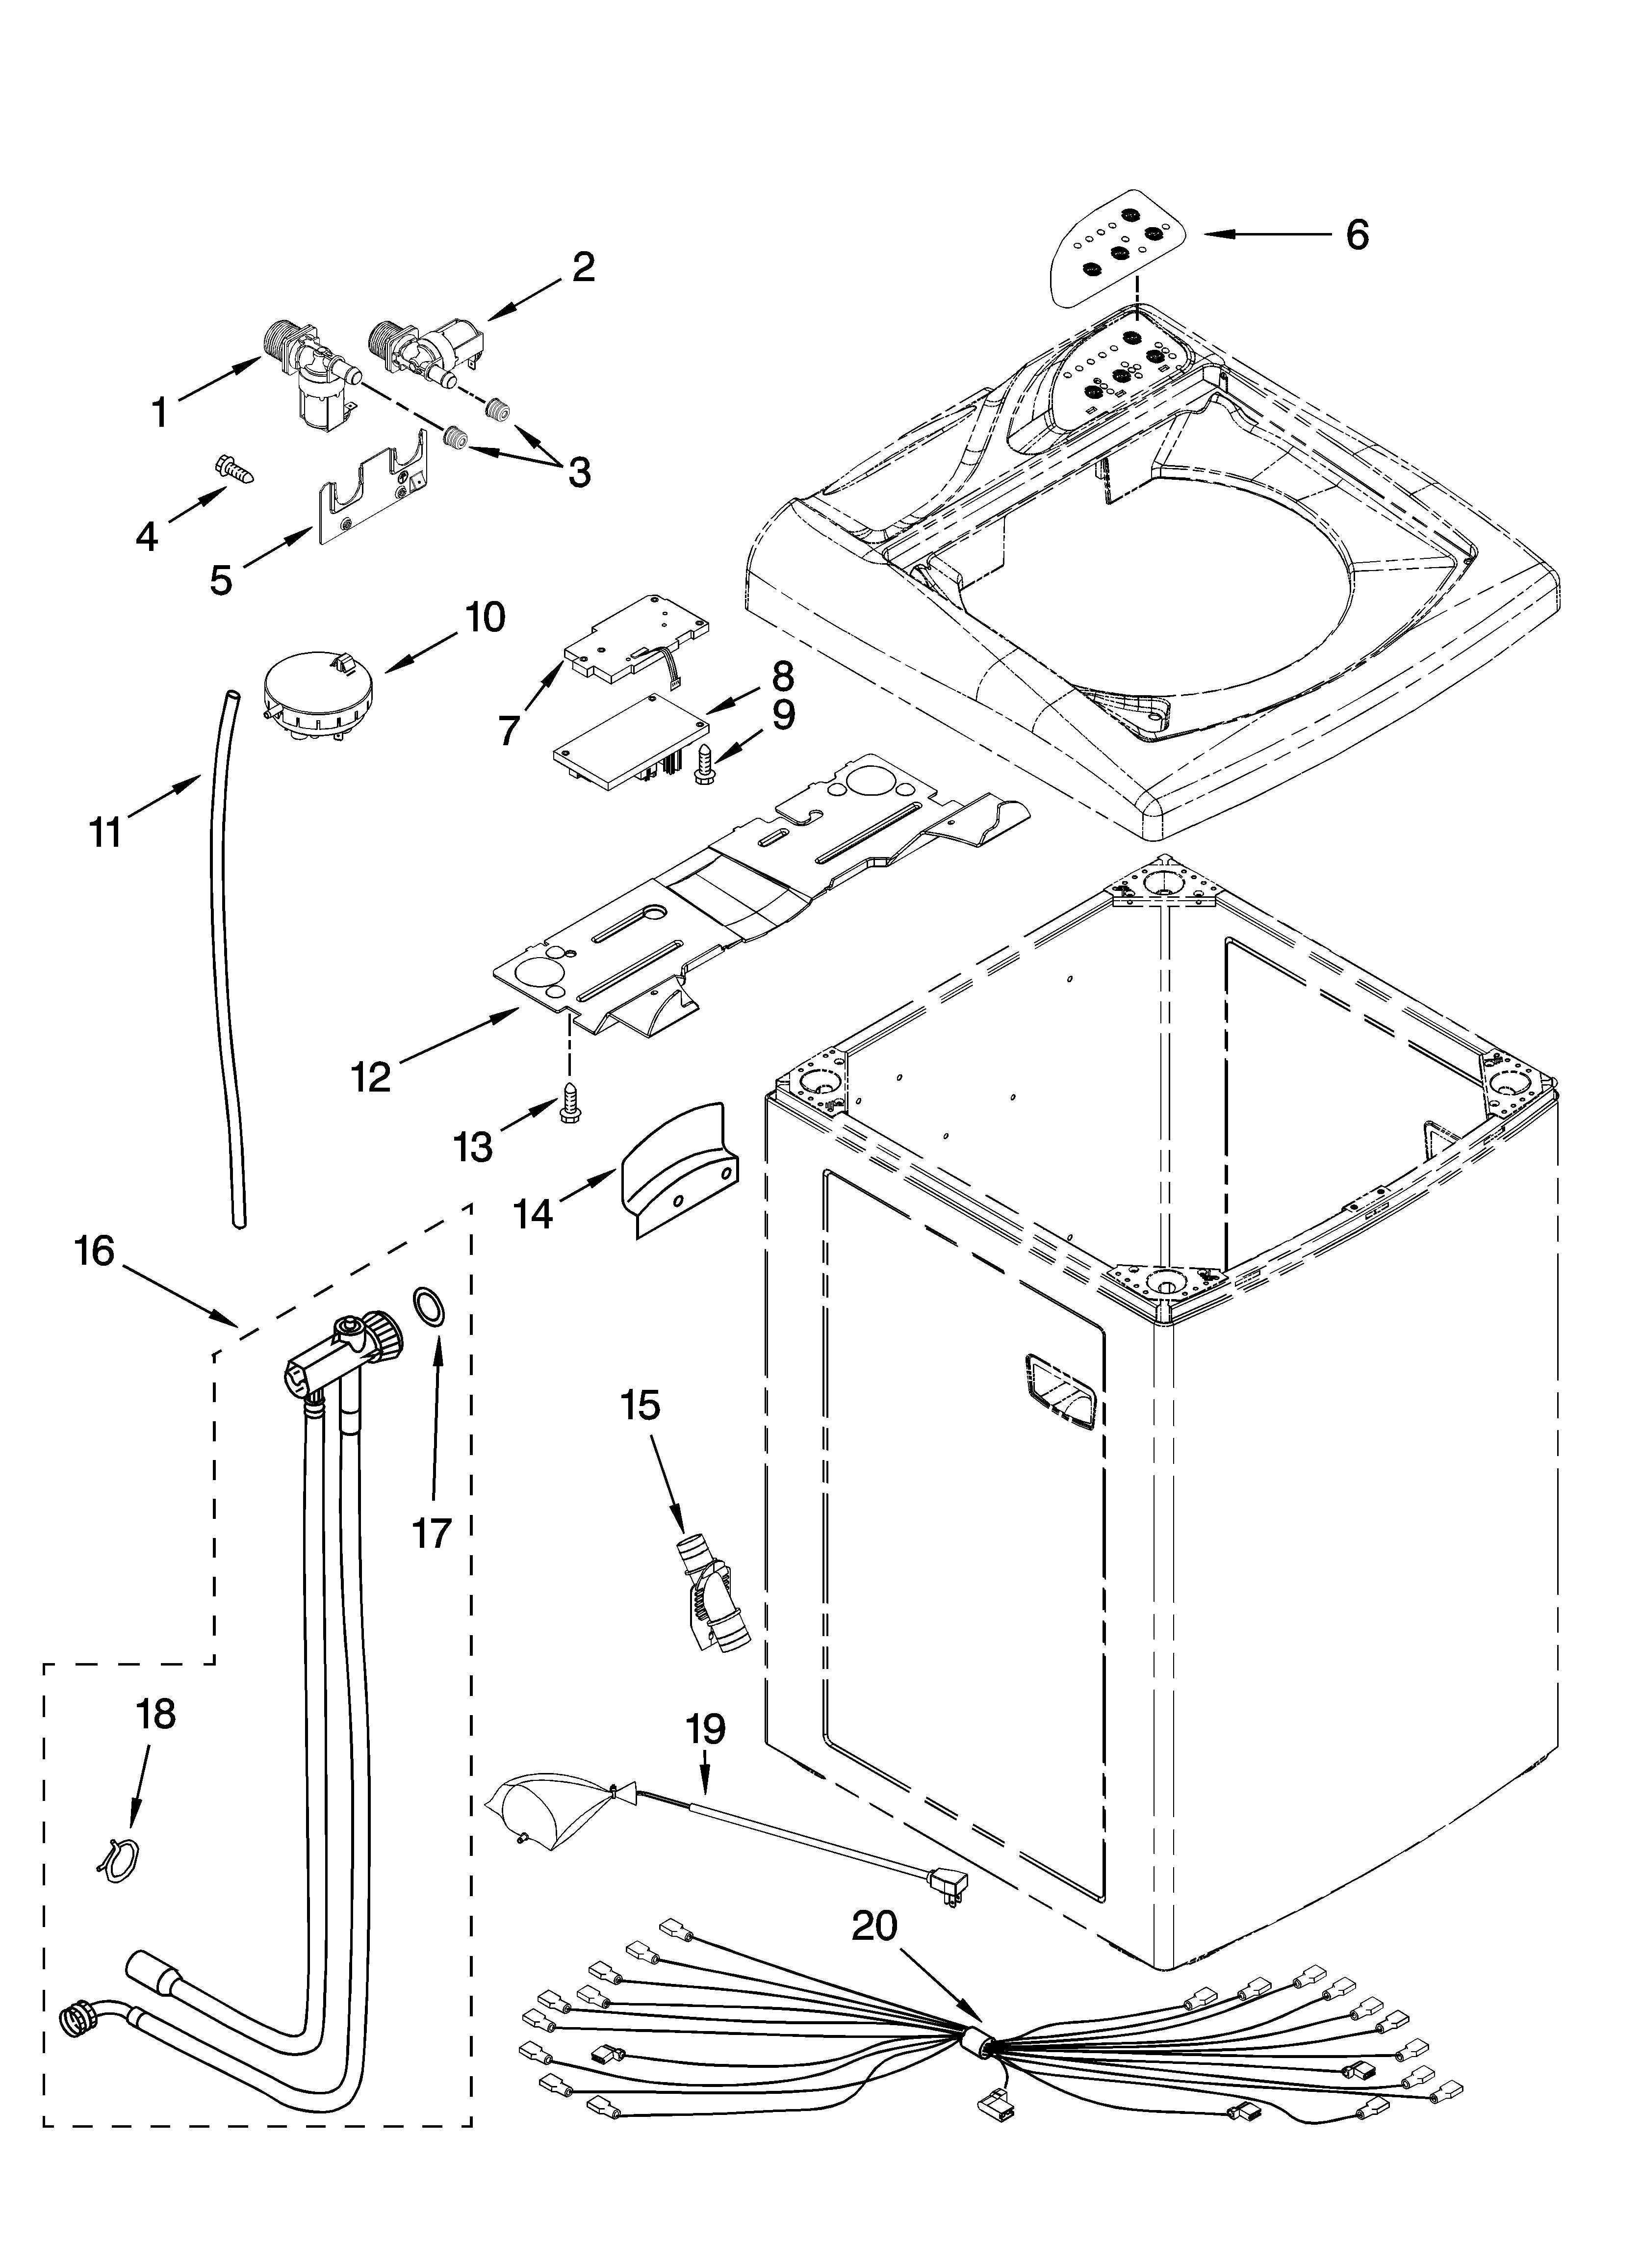
If the washing machine leaks water while it is filling, pull it away from the wall and see if the water drips from the inlet hoses or valves as the unit fills.
If it does, tighten the faucet packing nuts. Then, inspect the hoses and replace them if they have become cracked.
Also look for cracks in the casing of the inlet valves. Unplug the unit and lift the top to better inspect the valves.
Replace any valves that are cracked.
Valves usually crack when the hot water in the house water supply is heated to greater than 170 degrees.
They also crack if the house is left cold during the water and water is not drained from the unit. A cracked inlet nozzle can leak during fill.
The leaking water will drip down the outside of the tub and collect under the unit. Be sure that the hose connected to the inlet nozzle is tightly clamped.
Replace the nozzle if you find cracks in it.
If the leaking occurs at some time during the wash sequence other than when the machine is filling with water, unplug the unit, remove the back panel and examine the parts under the machine.
You can make a closer inspection by tipping the unit over onto it's front or side.
Tighten hose clamps that have become loose. If water is leaking from the pump, replace the pump.
The gasket between the tub and the splash guard may wear out and leak. To check the gasket, lift the top and remove the snubber and splash guard.
Replace a worn gasket. A hole in the bottom of the tub can develop.
If the hole is less than 1/4 inch in diameter, remove the agitator and basket and seal the hole.
If the hole is larger, replace the washing machine or tub.
Thanks for using FixYa - a 4 THUMBS rating is appreciated for answering your FREE question