Cars & Trucks Logo

Related Topics:

A
Anonymous Posted on Aug 14, 2017

1993 SUBARU LEGACY CRANKSHAFT PULLEY IS OF BEFORE FINDING TOP DEAD CENTER WHAT MUST I DO TO PROPERLY INSTALL THE CRANKSHAFT PULLEY IN RIGHT POSITION AND DOES THIS PULLEY GET A KEY STOCK INTO THE SLO

1993 SUBARU LEGACY CRANKSHAFT PULLEY IS OFF BEFORE FINDING TOP DEAD CENTER WHAT MUST I DO TO PROPERLY INSTALL THE CRANKSHAFT PULLEY IN RIGHT POSITION AND DOES THIS PULLEY GET A KEY STOCK INTO THE SLOT IN THE CENTER HOLE GOT NEW BELTS NEW PULLEY OLD BELTS ARE OFF OLD PULLEY ROCKED OFF NUT I WAS LUCKY TO GET HOME LOST AIR CONDITIONER AND POWER STEERING TWO BLOCKS AWAY.THANKS IF ANYONE KNOWS

5 Related Answers

rick_amick

Rick Amick

  • 73 Answers
  • Posted on Mar 24, 2009

SOURCE: Changing V belts on Nissan Frontier 2002 4cyl

That should be right if it is an idler pulley. On belts that do not have idler pulley you will have to loosen lock bolt on adjuster. Like alternator

Ad

Ronnie Wilson

  • 1596 Answers
  • Posted on May 31, 2009

SOURCE: Crankshaft Pulley..98 Subaru Forester

REMOVE OR DISCONNECT
Im Thinking you arw wanting info On the BUICK--If for the 98 Subaru Forester Same Concept and Procedures apply.


For 1995 Buick Park AVE. 3800 "Harmonic Ballancer" Pulley = Crankshaft Pulley. Requires A Flywheel LOCK tool, And A Harmonic Ballancer Pulley >PULLER and is Fairly Simple to Replace.

CAUTION: The balancer is serviced as an assembly. DO NOT attempt to separate pulley from balancer hub.
INSTALL OR CONNECT

  1. Crankshaft balancer.
    • Lubricate seal surface with engine oil.
  1. Balancer bolt.
    • Hold flywheel with J 37096 or equivalent.
    • Tighten balancer bolt to 150 Nm (110 lbs. ft.) +76°
Basicly use Pulley Mount BOLT to PUSH New Pulley Onto Crankshaft.
I Hope this Answers your Question and Good Luck

  1. Negative battery cable.
  2. Serpentine drive belt.
  3. Raise vehicle and suitably support.
  4. Right front tire and wheel.
  5. Inner fender splash shield (right side).
  6. Flywheel cover.

joecoolvette

joecoolvette

  • 5660 Answers
  • Posted on Aug 13, 2009

SOURCE: need a picture or diagram of top dead center/86' honda prelude 2.

From what I see in my manual,

1.There is a Timing Pointer on the back of the engine. There is a White mark on the flywheel. The white mark must line up with the timing pointer, for Number 1 piston to be at Top Dead Center.

2.Facing the engine, looking at the camshaft sprocket. The sprocket has spokes. On one of those spokes is the word, "UP" in raised letters, or there is a small Dot. As you can see here, the spoke with the word UP goes -> Up.
(Same thing of course if it is a Dot, instead of UP)

On the back of the camshaft gear, (Sprocket), are marks. On the edges of the camshaft gear. These line up with the top edge of the cylinder head. The surface of the cylinder head, where the valve cover bolts down to.

I'm sorry, at present I do not have a website, that I could link you to for a diagram, or photo.

Testimonial: "thanks for the help. that fixed my problem"

Anonymous

  • 1129 Answers
  • Posted on Nov 05, 2009

SOURCE: Doing Top Dead Center(TDC) before T-belt

It is important that you turn the engine in the correct direction. To achieve TDC firing stroke remove spark plugs insert a plasic straw into the number one spark plug hole and proceed to turn the engine over observe the straw keep turn ing the motor until the straw travels upward when it stops moving up stop turning, you will know you are at tdc by looking at the timing marks down on the crankshaft pulley the notch on the pulley should line up exactly to the number zero on the timing plate at the front lower part of the motor very close to the crankshaft pulley turn the motor over again and again until you line up the notch on pulley with the number zero you may need to clean the numbers off on the timing plate or front cover.

Testimonial: "Excellent tech advise and knowledgable. Thanks."

Jonah Oneal

  • 14092 Answers
  • Posted on Nov 07, 2009

SOURCE: installing timing chain on a 97 chevy c1500 5.7

CAMSHAFT GEAR AT 6 OCLOCK AND CRANK GEAR AT 12 OCLOCK.

Ad

Add Your Answer

×

Uploading: 0%

my-video-file.mp4

Complete. Click "Add" to insert your video. Add

×

Loading...
Loading...

Related Questions:

0helpful
1answer

The 1997 Diamante is a 2.5litre engine.Please assist with the firing order and cam shaft settings including diagrams as well.

I don't see a 2.5 l engine. Do you mean 3.5?


0900c15280037dc0-j1axptdruxmkgupulmd503d3-4-1.gif To install:
  1. Install the crankshaft pulley and turn the crankshaft sprocket timing mark forward (clockwise) three teeth to move the piston slightly past No. 1 cylinder top dead center.
  2. If removed, install the camshaft sprockets and tighten the bolts to 64 ft. lbs. (88 Nm).
  3. Align the timing mark of the left bank side camshaft sprocket.
  4. Align the timing mark of the right bank side camshaft sprocket, and hold the sprocket with a wrench so that it doesn't turn.
  5. Set the timing belt onto the water pump pulley.
  6. Check that the camshaft sprocket timing mark of the left bank side is aligned and clamp the timing belt with double clips.
  7. Set the timing belt onto the idler pulley.

WARNING
If any binding is felt when adjusting the timing belt tension by turning the crankshaft, STOP turning the engine, because the pistons may be hitting the valves.

  1. Turn the crankshaft one turn counterclockwise and set the timing belt onto the crankshaft sprocket.
  2. Set the timing belt on the tension pulley.
  3. Place the tension pulley pin hole so that it is towards the top. Press the tension pulley onto the timing belt, and then provisionally tighten the fixing bolt. Tighten the bolt to 35 ft. lbs. (48 Nm).
  4. Slowly turn the crankshaft two full turns in the clockwise direction until the timing marks align. Remove the four double clips.
  5. Install the crankshaft position sensor connector.
  6. Install the upper and lower covers on the engine and secure them with the retaining screws. Be sure the packing is properly positioned in the inner grooves of the covers when installing.
  7. Install the crankshaft pulley if it was removed. Tighten the bolt to 110 ft. lbs. (150 Nm).
  8. Install the air conditioning bracket and compressor on the engine. Install the belt tensioner.
  9. Install the power steering pump into position. Install the fan pulley and fan.
  10. Install the fan shroud on the radiator.
  11. Refill the cooling system.
  12. Connect the negative battery cable.
  13. Start the engine and check for fluid leaks.


1502974703830987510739-j1axptdruxmkgupulmd503d3-4-4.jpg
0helpful
1answer

When setting valve timing at what degrees crankshaft pulley mark be?

Finding TOP DEAD CENTER (TDC) Casually

mgaguru.com/mgtech/engine/cs111a.htm
Other times it needs to be a bit more accurate, like setting the crankshaft straight ... assembled engine, and you can use the timing mark on the crankshaft pulley to ... are 360 degrees apart, or offset by one complete rotation of the crankshaft. With TDC on the compression stroke the intake and exhaust valves are both closed.

Finding top dead center on No.1 cylinder when timing marks ...

answers.edmunds.com > Edmunds Answers
Feb 21, 2010 - The crankshaft on a 4 cycle motor in never 180 degrees off between ... Because of this; the timing mark on the crankshaft pulley will be in exactly the same ... So it isn't necessary to know that distinction when setting ignition timing. ... If the exhaust valve spring is about to become fully relaxed, while the ...
0helpful
1answer

How many foot pounds of torque should i tighten the bolt that holds on the harmonic balance on a 1996 subaru legacy outback

From FSM:

B: INSTALLATION
1) Install the crankshaft pulley.
2) Install the pulley bolt.
To lock the crankshaft, use ST.
ST 499977400 CRANKSHAFT PULLEY
WRENCH
(1) Clean the crankshaft pulley thread using an
air gun.
(2) Apply engine oil to the crankshaft pulley bolt
seat and thread.
(3) Tighten the bolts temporarily with tightening
torque of 44 N·m (4.5 kgf-m, 33 ft-lb).
(4) Tighten the crankshaft pulley bolts.
Tightening torque:
127 N·m (13 kgf-m, 94.0 ft-lb)
0helpful
1answer

Como poner la banda de tienpo de un toyota camery

Installation
1.Install No. 2 idler pulley (if removed). Install and tighten bolt to specification. See TORQUE SPECIFICATIONS . Ensure idler pulley is clean and rotates smoothly. 2.Install No. 1 idler pulley and tension spring (if removed). Pry No. 1 idler pulley away from timing belt area as far as possible. Temporarily tighten No. 1 idler pulley bolt. Ensure idler pulley is clean and rotates smoothly. 3.Using crankshaft pulley bolt, rotate crankshaft so timing mark on crankshaft sprocket aligns with timing mark on oil pump housing. See. This will position keyway in crankshaft sprocket at 12 o'clock position.

CAUTION:If reusing timing belt, ensure reference marks on timing belt align with reference marks placed on crankshaft and camshaft sprockets. Ensure timing belt is installed in original direction of rotation.
4.Ensure all sprockets and idler pulleys are clean. Install timing belt on crankshaft sprocket, oil pump sprocket, No. 1 idler pulley, and then No. 2 idler pulley in sequence. 5.Install timing belt guide with cupped side away from crankshaft sprocket and flat side toward timing belt. Install No. 1 timing belt cover and new gasket. 6.Align crankshaft pulley key groove with key in crankshaft. Install crankshaft pulley. Install and tighten crankshaft pulley bolt to specification. 7.Rotate crankshaft clockwise so cylinder No. 1 is at TDC on compression stroke. Ensure timing mark on crankshaft pulley aligns with "0" mark on No. 1 timing belt cover. If reusing timing belt, ensure reference mark on timing belt aligns with upper edge of No. 1 timing belt cover. 8.Rotate camshaft, and align hole in camshaft sprocket with alignment mark on camshaft bearing cap. See Fig. 2 . Install timing belt on camshaft sprocket. If reusing timing belt, ensure reference mark on timing belt aligns with the reference mark on camshaft sprocket. Ensure tension exists on timing belt between the crankshaft and camshaft sprockets.
CAUTION:DO NOT rotate crankshaft counterclockwise, as viewed from timing belt end of engine.
9.Loosen No. 1 idler pulley bolt 1/2 turn. Rotate crankshaft pulley 2 full revolutions clockwise from TDC to TDC. 10.Ensure timing mark on crankshaft pulley aligns with "0" mark on No. 1 timing belt cover, and hole in camshaft sprocket aligns with alignment mark on camshaft bearing cap. See Fig. 2 . If timing marks are not aligned, remove timing belt and reinstall. 11.Rotate crankshaft clockwise 1 and 7/8 revolutions and align crankshaft pulley "0" mark with 45-degree Before Top Dead Center (BTDC) mark on No. 1 timing belt cover. See Fig. 5 . 12.Tighten No. 1 idler pulley bolt to specification. See TORQUE SPECIFICATIONS . Install No. 2 timing belt cover and gaskets. Install and tighten spark plugs to specification. 13.To install remaining components, reverse removal procedure. Install all bolts/nuts on right (timing belt side) engine mount before tightening to specification. 14.On Camry, when installing control rod and bracket on strut tower and right (timing belt side engine mount, tighten bolts to specification in sequence.
13helpful
1answer

I need the timing marks for a 1999 ford escort ZX2 2.0L DOHC

NOTE: Make sure the correct (second) notch in the pulley is indexed to the lower cylinder block (6010).
Position the crankshaft (6303) just prior to top dead center. Install the Camshaft Alignment Timing Tool on the back of the camshafts. fcdabeb.gif
  1. NOTE: Make sure the correct (second) notch in the pulley is indexed to the lower cylinder block (6010).
    Position the crankshaft (6303) just prior to top dead center.

2.Remove the bolt and install the top dead center timing peg
3 Rotate the crankshaft clockwise against the peg.
5332a96.gif NOTE: Installation of the alignment tool into the exhaust camshaft (6250) may require the camshaft to be rotated clockwise.
Install the Camshaft Alignment Timing Tool on the back of the camshafts. 9e76853.gif
  1. Install the intake timing sprocket and loosely install the bolt.
  1. Rotate the oil control bushing one full turn and inspect for binding. Position the bushing with the single hole in the 12 o'clock position.
  2. f7eb1fd.gif
    1. Install a new exhaust sprocket O-ring into the exhaust sprocket.
    1. Install the exhaust camshaft sprocket. Make sure that the tab on the sprocket engages the hole previously positioned at 12 o'clock in the oil control solenoid bushing.
      • Loosely install the bolt.
      • 73bc433.gif
    1. Loosely install the timing chain tensioner.
    1. Install the timing belt.
    2. 9406c65.gifEngage the timing belt tensioner tab into the upper timing cover backplate. a1cb4c6.gif
      Using a 6 mm Allen wrench, adjust the timing belt tensioner until the index marks are aligned. Tighten the bolt
    809c9dc.gif
    1. sxf~us~en~file=ani_caut.gif~gen~ref.gif CAUTION: The camshaft must be held stationary with an open-end wrench. Do not use the alignment tool to hold the camshaft in position or damage to the camshaft may occur.
      Tighten the bolt on the intake camshaft sprocket.
    2. 25f34cb.gif
    1. sxf~us~en~file=ani_caut.gif~gen~ref.gif CAUTION: The camshaft must be held stationary with an open-end wrench. Do not use the alignment tool to hold the camshaft in position or damage to the camshaft may occur.
      Tighten the bolt on the exhaust camshaft sprocket in three steps.
      • Tighten the bolt to 50 Nm (36 lb-ft).
      • Remove the TDC peg and Camshaft Alignment Timing Tool.
      • Tighten the bolt to 115-125 Nm (85-92 lb-ft).
      • 24c43e7.gif
      Install the VCT oil plug.c96f65a.gif
    1. NOTE: Make sure the correct (second) notch in the pulley is indexed to the lower cylinder block.
      Position the crankshaft just prior to top dead center.
    2. 993d4ea.gifRemove the bolt and install the TDC peg. Rotate the crankshaft clockwise against the peg. NOTE: Installation of the alignment tool into the exhaust camshaft may require the camshaft to be rotated clockwise. If the alignment tool does not align and install in the camshafts, repeat Steps 1 through 17.
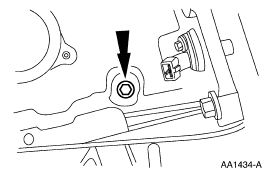
      Install the Camshaft Alignment Timing Tool on the back of the camshafts.
      1. Remove the alignment tool and TDC timing peg.
      1. Install the bolt. 5332a96.gif
    0helpful
    1answer

    I have a 1993 subaru Legacy that is out of time. I'm trying to find out how to find the markings to put it back into time

    all marks align at noon,both lines on camshafts point up ,don't follow any marks on face of crankshaft gear follow line located on reluctor this is part of the crankshaft gear on back of it, the line on the reluctor needs to face noon and match a line on the oilpump where the crankshaft position sensor is installed good luck
    1helpful
    1answer

    Needing schematics for timing belt on a 2000 se

    Removal & Installation

    2.0L Engine
    1. Remove or disconnect the following:

      Negative battery cable Spark plugs Catalytic converter Right front wheel Right inner splash shield Accessory drive belt and idler pulley
    2. Rotate the crankshaft to Top Dead Center (TDC) and install Crankshaft TDC Timing Peg T97P-6000-A.
    3. Rotate the crankshaft clockwise against the peg.
    4. Remove or disconnect the following:

      Water pump pulley Valve cover Crankshaft pulley Timing belt covers
    5. Install Camshaft Alignment Timing Tool T94P-6256-CH into theslots of both camshafts at the rear of the cylinder head to lock thecamshafts into position.
    6. Loosen the timing belt tensioner bolt and relieve the tension onthe timing belt by disconnecting the tensioner tab from the timingcover back plate.
    7. Remove the timing belt.

      0900c152801e2a75.jpg enlarge_icon.gifenlarge_tooltip.gifFig. Crankshaft alignment position-Ford 2.0L (VIN 3) engines


      0900c152801e2a76.jpg enlarge_icon.gifenlarge_tooltip.gifFig. Placement of Camshaft Alignment Timing Tool T94P-6256-CH-Ford 2.0L (VIN 3) engines


      0900c152801e2a77.jpg enlarge_icon.gifenlarge_tooltip.gifFig. Timing belt tensioner index marks-Ford 2.0L (VIN 3) engines

    To install:

    NOTE Always replace the timing belt after loosening or removing it.
    1. Install the timing belt.
    2. Engage the timing belt tensioner tab into the timing cover back plate.
    3. Adjust the timing belt tensioner until the index marks are aligned. Tighten the tensioner bolt to 17-20 ft. lbs. (22-28 Nm).
    4. Remove the camshaft alignment tool and the crankshaft TDC peg.
    5. Install or connect the following:

      Timing belt covers Crankshaft pulley. Tighten the bolt to 81-89 ft. lbs. (110-120 Nm). Valve cover Water pump pulley Accessory drive belt and idler pulley Right inner splash shield Right front wheel Catalytic converter Spark plugs Negative battery cable
    6. Start the engine and check for proper operation.
    1helpful
    3answers

    Cant seem to time my 1990 subaru legacy

    your timeing marks are on the block rite abouve the cams on either side and on the block in the middle but line the center mark on the teeth there is a mark not the arrow the arrow is where tdc is the mark is on teeth good luck.
    17helpful
    2answers

    Need instructions to replace 1993 Toyota Camry Timing Belt

    Hi Kmcarroll77

    TIMING BELT REPLACEMENT - 2.2L -1993 Toyota Camry

    Installation
    1.Install No. 2 idler pulley (if removed). Install and tighten bolt to specification. See TORQUE SPECIFICATIONS . Ensure idler pulley is clean and rotates smoothly. 2.Install No. 1 idler pulley and tension spring (if removed). Pry No. 1 idler pulley away from timing belt area as far as possible. Temporarily tighten No. 1 idler pulley bolt. Ensure idler pulley is clean and rotates smoothly. 3.Using crankshaft pulley bolt, rotate crankshaft so timing mark on crankshaft sprocket aligns with timing mark on oil pump housing. See. This will position keyway in crankshaft sprocket at 12 o'clock position.

    CAUTION:If reusing timing belt, ensure reference marks on timing belt align with reference marks placed on crankshaft and camshaft sprockets. Ensure timing belt is installed in original direction of rotation.
    4.Ensure all sprockets and idler pulleys are clean. Install timing belt on crankshaft sprocket, oil pump sprocket, No. 1 idler pulley, and then No. 2 idler pulley in sequence. 5.Install timing belt guide with cupped side away from crankshaft sprocket and flat side toward timing belt. Install No. 1 timing belt cover and new gasket. 6.Align crankshaft pulley key groove with key in crankshaft. Install crankshaft pulley. Install and tighten crankshaft pulley bolt to specification. 7.Rotate crankshaft clockwise so cylinder No. 1 is at TDC on compression stroke. Ensure timing mark on crankshaft pulley aligns with "0" mark on No. 1 timing belt cover. If reusing timing belt, ensure reference mark on timing belt aligns with upper edge of No. 1 timing belt cover. 8.Rotate camshaft, and align hole in camshaft sprocket with alignment mark on camshaft bearing cap. See Fig. 2 . Install timing belt on camshaft sprocket. If reusing timing belt, ensure reference mark on timing belt aligns with the reference mark on camshaft sprocket. Ensure tension exists on timing belt between the crankshaft and camshaft sprockets.
    CAUTION:DO NOT rotate crankshaft counterclockwise, as viewed from timing belt end of engine.
    9.Loosen No. 1 idler pulley bolt 1/2 turn. Rotate crankshaft pulley 2 full revolutions clockwise from TDC to TDC. 10.Ensure timing mark on crankshaft pulley aligns with "0" mark on No. 1 timing belt cover, and hole in camshaft sprocket aligns with alignment mark on camshaft bearing cap. See Fig. 2 . If timing marks are not aligned, remove timing belt and reinstall. 11.Rotate crankshaft clockwise 1 and 7/8 revolutions and align crankshaft pulley "0" mark with 45-degree Before Top Dead Center (BTDC) mark on No. 1 timing belt cover. See Fig. 5 . 12.Tighten No. 1 idler pulley bolt to specification. See TORQUE SPECIFICATIONS . Install No. 2 timing belt cover and gaskets. Install and tighten spark plugs to specification. 13.To install remaining components, reverse removal procedure. Install all bolts/nuts on right (timing belt side) engine mount before tightening to specification. 14.On Camry, when installing control rod and bracket on strut tower and right (timing belt side engine mount, tighten bolts to specification in sequence. See Fig. 6 . On MR2, tighten engine
    b7619be.jpg
    92cabaf.jpg
    Hope this helps, don't forget to rate.

    Lazaruselite
    Not finding what you are looking for?

    116 views

    Ask a Question

    Usually answered in minutes!

    Top Subaru Experts

    ZJ Limited
    ZJ Limited

    Level 3 Expert

    17989 Answers

    Thomas Perkins
    Thomas Perkins

    Level 3 Expert

    15088 Answers

    Oliver Street

    Level 2 Expert

    73 Answers

    Are you a Subaru Expert? Answer questions, earn points and help others

    Answer questions

    Manuals & User Guides

    Loading...