Tip & How-To about Apple Computers & Internet

How to fax from an iPhone or an iPad using a free app for iOS

The Popcompanion app for iOS is a handy tool for scanning and faxing documents from an iPhone or iPad to any national or international fax number, or to multiple fax numbers at once. Popfax built this application to bring a modern faxing experience to businesses and to help professionals stay connected to their colleagues and clients from anywhere, at any time.

Below is a list of some of the key features in Popcompanion 1.7. Every iOS user can rank their importance by their usage experience.

Scan & fax documents within native Apple camera interface
iPhone and iPad users can scan documents using the familiar interface of their native Apple camera and fax them an once to any fax number.

Connection with Photo Library
The app is tightly integrated with other Apple products. Popcompanion 1.7 lets users choose images from their Photo Library and fax them right away. It is so intuitive to fax images that have previously been scanned and saved in the library.

Perspective Crop Tool
It enables users to isolate different planes within an image and crop to correct distortions caused by perspective.

Print faxes through Apple Wi-Fi printers
Wi-Fi Direct Printing allows users to print both sent and received faxes to Apple Wi-Fi printers without adding additional drivers or software on the Apple device, forming a peer-to-peer network between the device and the printer.

Advanced search and management of search resultsThe updated Popcompanion allows users to search faxes in folders as well as to make global search requests in the account: by content, contact name or contact number. The documents from search requests can be deleted, moved to other folders and forwarded directly, all from the search interface.

Drag-down function
This iOS-intuitive function refreshes manually the fax listing, to update changes and check for new faxes.

Offline Mode
The application allows users to create, modify and delete folders, transfer faxes to other folders, manage contacts and groups, send faxes and SMS through PopCompanion even without an Internet connection. PopCompanion 1.7 puts actions in a queue, waiting for the next network connection to synchronize. When the user returns online, the PopCompanion mobile application will automatically synchronize with the Popfax account.

This application can be downloaded from the App Store.

Posted by on

Computers & Internet Logo

Related Topics:

Related Questions:

0helpful
4answers

recover deleted messages

There are lots of different methods to recover deleted messages. You can follow below steps to reach your aim.
After you delete messages on iPad, you suddenly find that the messages are useful, what should you do? Actually, the iPad delete messages can be recovered. This part will tell you how to retrieve deleted messages on iPad in detail. I recommend you use Leawo iOS Data Recovery to help you solve the issue on how to recover deleted iMessages on iPad, for this tool is quite useful to recover files and data on iDevices that have been lost, damaged or deleted. All iDevices can use Normal Mode of Leawo iOS Data Recovery. Only iPhone 4 and iPod Touch 4 can use DFU Mode now to solve how to recover deleted iMessages on iPad. You could refer to the following steps to check how to retrieve deleted messages on iPad.

1. Connect iPad to PC and Choose Normal Mode

Plug your iPad into PC and launch Leawo iOS Data Recovery, and then tap the option of "Recover from iOS Device". A window will pop up to ask you "Whether to enter DFU mode", and you need to click "Normal".

2. Click on "Start"

Tap "Start" button to start scanning the iPad data.

3. The Scanning Process

When the scanning starts, wait until the process is over.

4. Tap "Messages" and "Recover"

When the scanning process is over, your iPad data will show on the left side of the panel. Tap "iPad > Messages" to check all messages on the right side of the screen. Then tick "Only display the deleted items". Choose the iPad delete messages you want to recover, and click on "Recover" at bottom right of the interface.

5. Set Output Path and Recover Messages

A dialog will pop up to direct you to save the recovered messages to a folder you set. Tap "Open" on the right side of "Save to" to select a folder on PC to save the retrieved iPad delete messages. You can check "Automatically open the output folder after finishing recovery" if you need. Click on "Go" button to begin the data-recovery procedure, and you can recover the iPad delete messages to your computer.

As mentioned, this software enables users to recover various kinds of files of iDevices. If you have deleted other kinds of files by mistake, you can also use this tool to help you. Once you use this program, you will find how powerful it is to help you solve how to recover deleted iMessages on iPad.

delete-messages-and-recover-deleted-messages-11-vrpz42mk1tbypv5oo32zlffx-3-0.jpg 
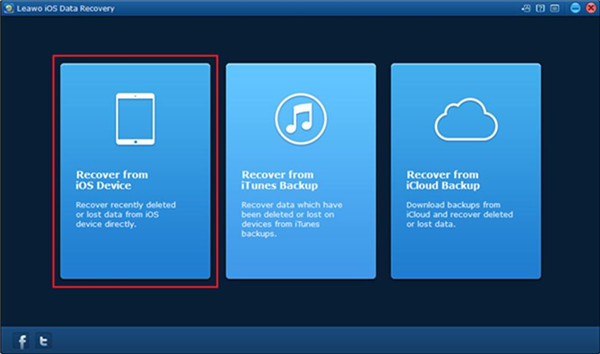
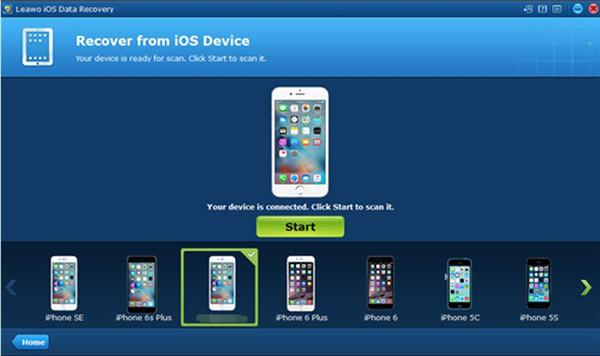
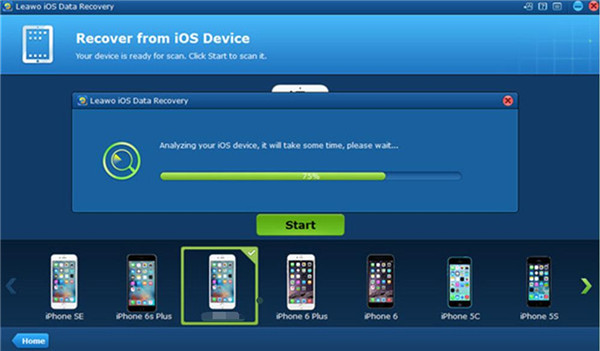
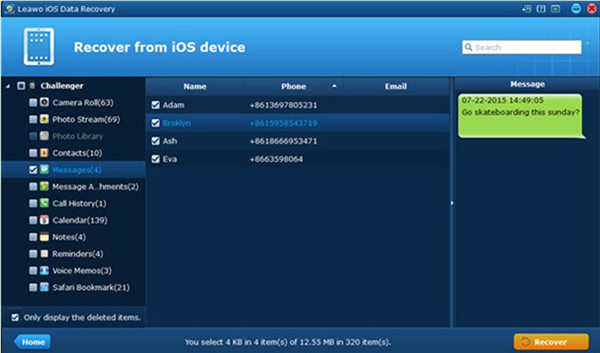
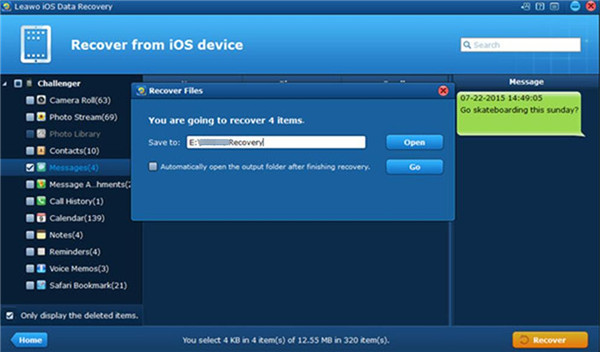
For more details, check: How to Recover Deleted iMessages from iPhone/iPad/iPod touch
Not finding what you are looking for?

862 views

Ask a Question

Usually answered in minutes!

Top Apple Computers & Internet Experts

Paul Carew

Level 3 Expert

3808 Answers

Grand Canyon Tech
Grand Canyon Tech

Level 3 Expert

3867 Answers

Paul Bade

Level 3 Expert

1818 Answers

Are you an Apple Computer and Internet Expert? Answer questions, earn points and help others

Answer questions

Loading...